It's done. Good God Almighty, it's done. Let's back track a few weeks, shall we?
About 4 weeks ago, we saw a Toys R Us flyer that had a nice looking wooden Swingset for $500. We decided it was time for Riley to have one, since she enjoys all the ones she plays with. So we journey up to Toys R Us and check it out. In fact, it's marked down to $400. It looks good, but we decide to wait until next weekend to actually purchase it.
So the following Saturday, I take all the car seats out of the van, and cross my fingers that I can get the swingset boxes in the back.
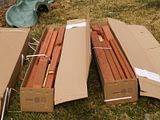
Upon arrival, I learn that they've sold out of the swingset that we we wanted. No idea when it would be back in stock, no rainchecks. So we upgrade to a bigger and better one, (the one I actually liked from the start). We load the stuff up into the van, it fits perfectly. I unload the boxes, and it sits in my back yard for a week, when I can get some help.
Day 1.
So, last Sunday my friends Eric and Randall arrive around 10:30. It's was a blustery cold day. Somewhere around 40 Degrees. Eric has assembled one of these before, and Randall has re-done his house. I'm in good company.
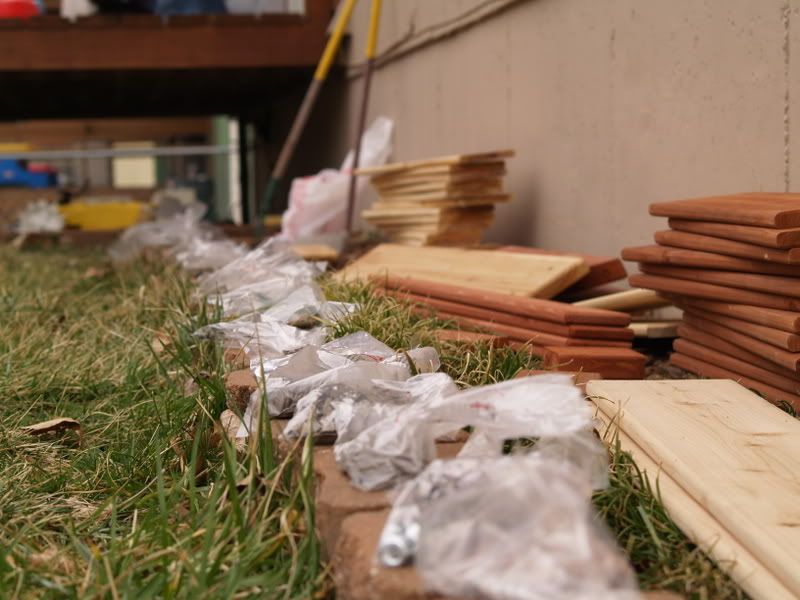
We open up the boxes.
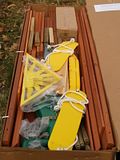
and sort out all the lumber and screws and bolts.
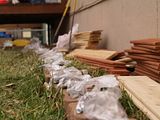
All this took a good hour and a half. Lunchtime, but we were psyched up.
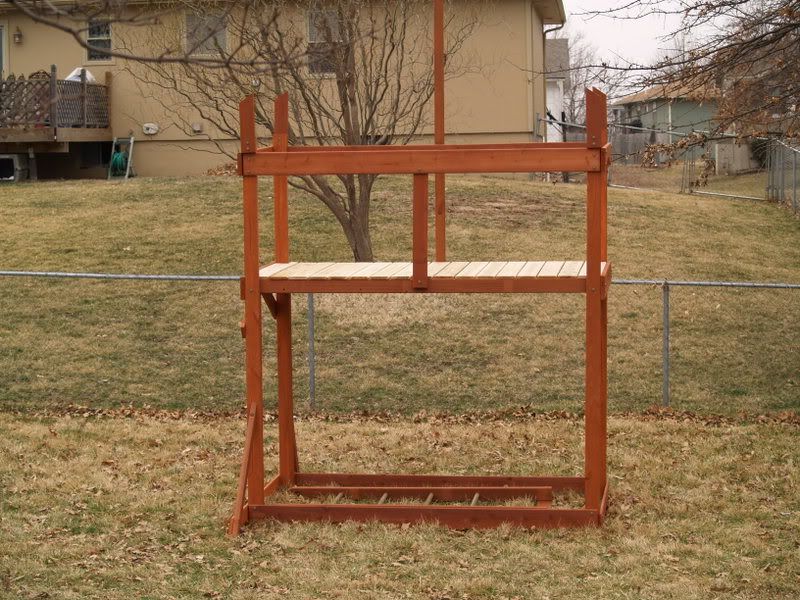
After assembling as much as we could, and only a few minor mistakes, we finished the cold day around 5:30 and this much was done.
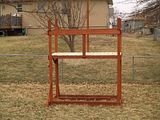
Seven Hours. This much.
Day 2.
Actually, I put in a little work before supper on Tuesday, and added the vertical slats that go around the outside of the main platform of the tower. But we'll call the following Saturday, Day 2.
Day 2 actually went fairly well. I was by msyelf, and my batteries for my Cordless Drill started to wear down by the end of the day, but it went well.
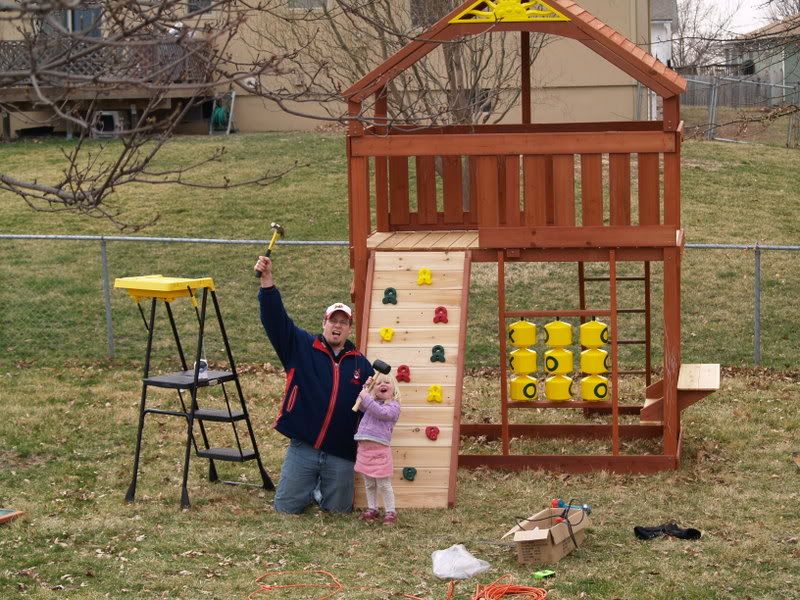
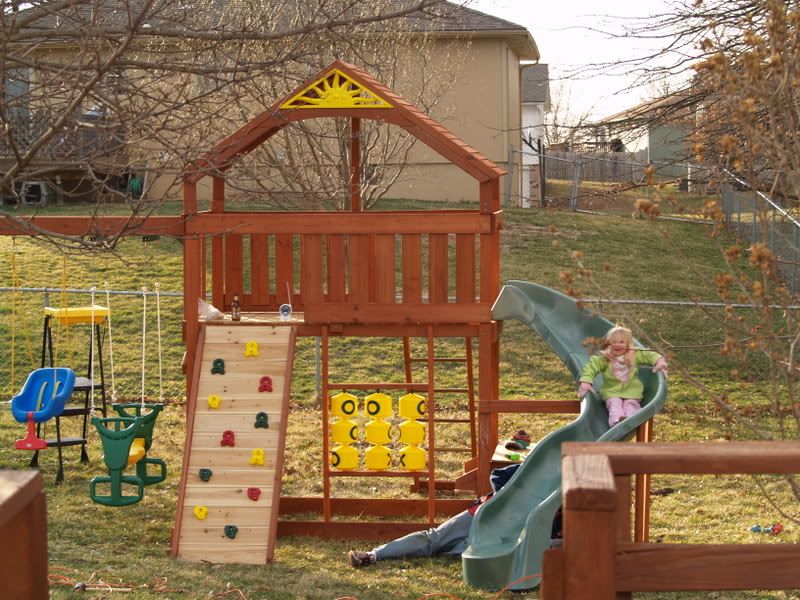
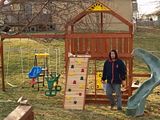
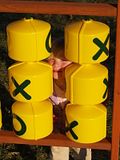
I put the roof and shingles on, but I had to modify from the instructions. This will be a recurring theme from here on out. I put the ladder on. I built and attached the rock wall. I built the Tic Tac Toe game, and the small bench. Overall, not a bad day, but a lot of screwing with the drill. My hand and body were sore.
I finished Day 2 by assembling the parts that would become the cross beam for the swingset, and the A-Frame that supports it from the side.
As you can see, I was still all smiles at this point.

Day 3 - Armageddon.
Now, I'll have to scan the instructions when I get home and include them, but Day 3 was riddled with mishaps. I clearly followed the instructions a number of times, but as it turns out, the illustrations in the manual are just plain WRONG.
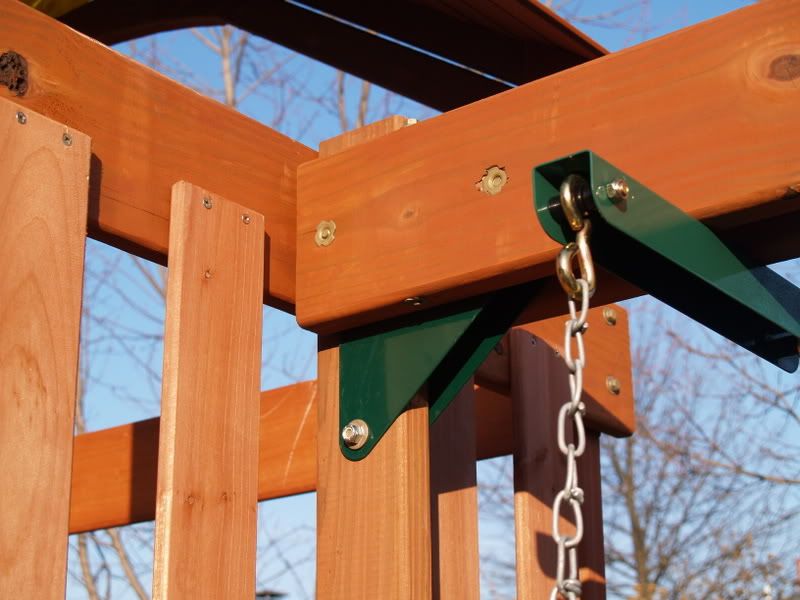
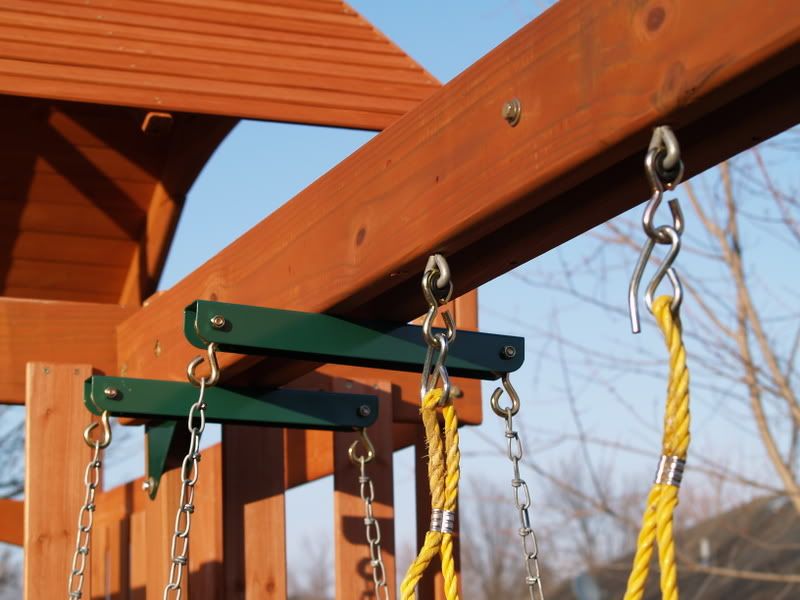
I've got two long 2x4s that comprise the cross beam for the swings. there are a bunch of little holes long the edge of each. There's a small block that joins the two in the middle, and you screw the two 2x4s together for added strength. At the end of each 2x4, you attach a green, triangular plate. These are used to attach the beam to both the tower, and the A-Frame.
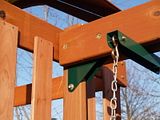
However, the first time I built the beam, I had the plates on one 2x4 on upside down. My fault. So I broke the beam down, reversed the plates and re-assembled.
It's important to note that at this point, the instructions CLEARLY showed the holes on the TOP of the beam. Then, I was able to get Jodie to come help me add the beam to the A-Frame, and the tower. But, we realized that when I flipped the first 2x4 onto the 2nd 2x4, all of a sudden, one set of holes is on the top, one set is on the bottom. So I had to take it down and break it down again.
So once again, I'm doing something different than the instructions show. Jodie has to go back inside to watch the kids. I re-assemble the beam, and then begin the task of trying to attach the beam to the A-frame BY MYSELF. After struggling for a long time, I realize it's better to insert the small bolt first, then attach the longer bolt. So I finally get the beam attached to the A-Frame. Then attached to the tower. I triumphantly walk into the kitchen and open a beer. "LOOK AT WHAT I DID BY MYSELF!"
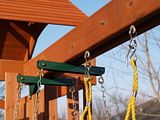
Jodie says, "Um, are you sure the holes go on the top of the beam?"
I say, "Of course! It clearly shows they go on the top." Then I get to thinking, how am I going to hang swings from the top of the beam? Nope. Holes should go on the bottom. About 2 or 3 pages later, it now clearly shows the holes on the bottom of the beam. At this point, I nearly cry.
So I take the beam off AGAIN. Fortunately at this point, I'm getting fairly good at tearing this thing apart. But by this point, my patience is shot. It's kind of a blur, but at one point I nearly had the bolt through the A-Frame. I think it's ready to be screwed in with the socket I have attached to the drill but...
the socket has fallen off the drill and is hiding in the grass and leaves. 10 Minutes of crawling around on my knees, feeling the grass, I find it. At some point, I lost a nut for the bolt that way too. it was sandy brown colored and blended in perfectly with my dead grass. It was at that point that Jodie came out and helped. I was beaten.
Fortuantely, I found the nut. Jodie and I were able to assemble the beam a third, or is it fourth, time. At this point, I'm ready to torch this thing to the ground.
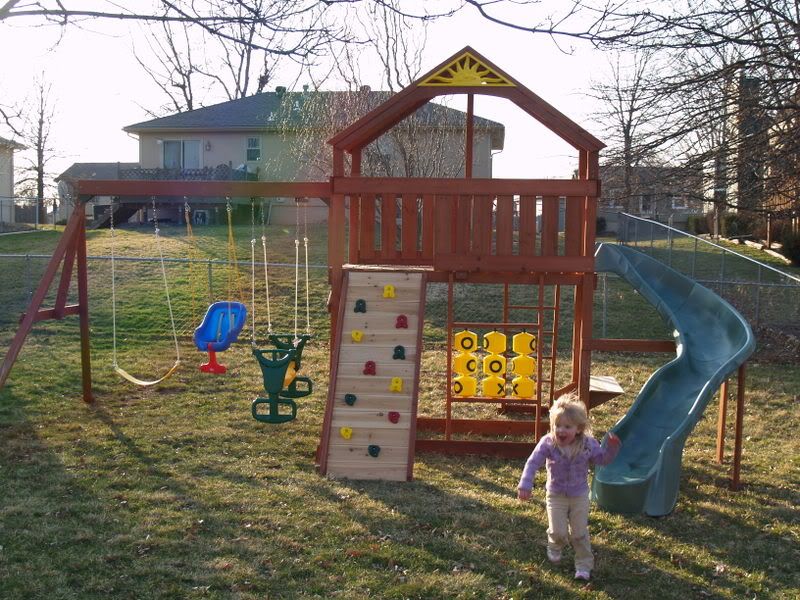
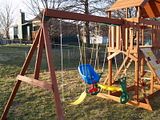
I must have spent 2 to 3 hours building and rebuilding that beam. In the cold. But it was done. The next hour and a half flew by. The end was near. I assembled the glider.

Those aren't scars on the plastic, those are chalk marks. As soon as Riley saw the swings, she flipped out!
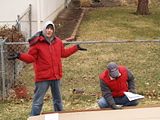
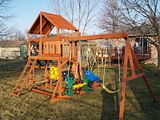
I sank the stakes into the ground and secured the whole thing. I dug the holes for the slide. Jodie helped me attach it and with that, we were done. Can you see the look of exhaustion and relief on my face? But hearing Riley "Whee!" down the slide almost immediately after she started the slide made it worth it.

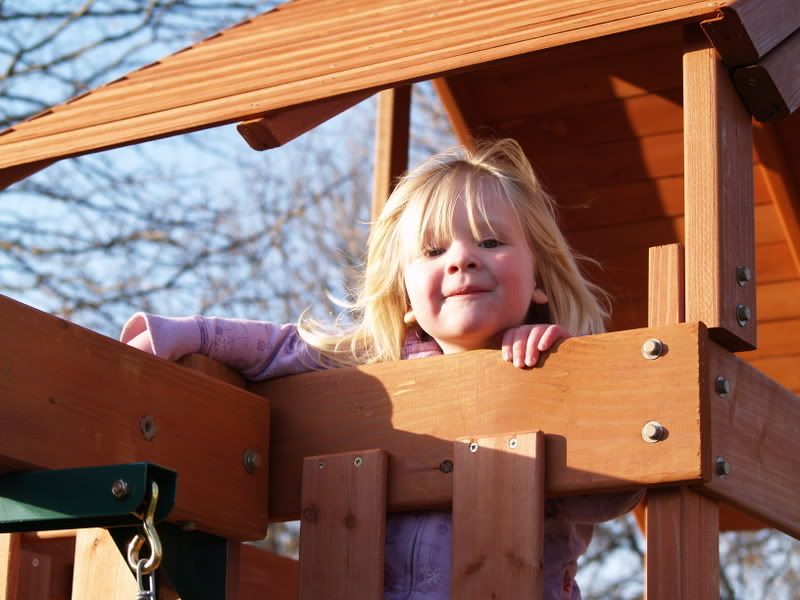
The rest of the pictures were taken last night. It was a beautiful early spring evening and Riley played while I took pictures. She climbs UP the slide. She slides down. Then she runs as fast as she can to climb the ladder again.


It was a tremendous pain, but it's done, and it's worth it. Now, I've just got to figure out if it's worth the trouble to call and complain about the instructions.